

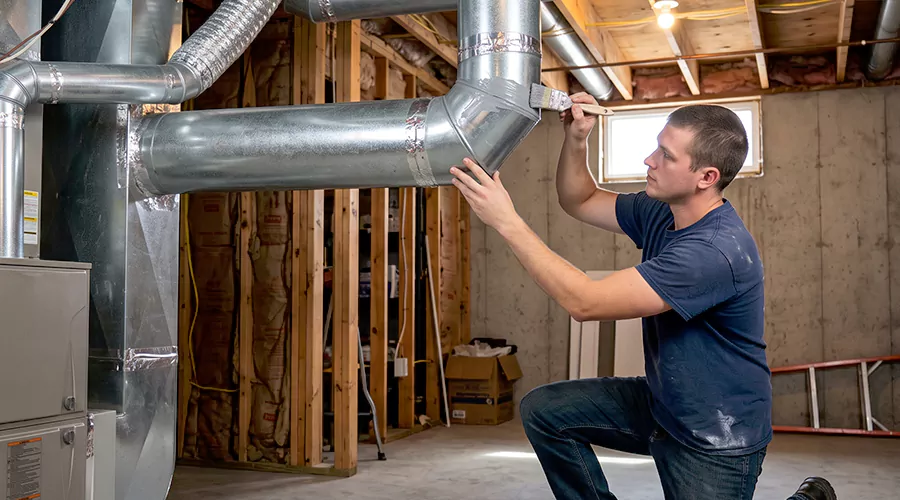
You can seal air ducts by repairing loose connections and applying HVAC-rated mastic sealant or approved metal-backed foil tape to accessible gaps and seams. A professional duct sealing service can ensure the duct sections must be securely connected before sealing, and damaged insulation should be restored afterward. In 2026, professional residential duct sealing typically costs $500 to $4,000, depending on the size of the system and how difficult the joints are to reach.
Air ducts distribute heated and cooled air throughout a home. When these ducts contain gaps or poorly connected sections, conditioned air can escape into attics, crawlspaces, and other unintended spaces. Return ducts can also draw dusty or unconditioned air into the system through damaged connections. Both problems can affect indoor comfort and heating or cooling performance.
ENERGY STAR estimates that typical homes lose approximately 20% to 30% of the air moving through their duct systems because of leaks, holes, and poorly connected ducts. Proper sealing can reduce this waste, but it must be performed without blocking the intended airflow. Understanding where leaks develop and which sealing materials are suitable helps homeowners identify repairs that can be completed safely.
Why Is Air Duct Sealing Important?
Air duct sealing helps keep conditioned air moving through its intended path between HVAC equipment and occupied rooms. When supply ducts leak, some heated or cooled air never reaches the registers. The HVAC system may then need to operate longer to maintain comfortable temperatures. This is particularly wasteful when the escaping air enters an unconditioned attic or crawlspace.
Return-side leakage creates a different problem because it can pull air into the system from unintended locations. Attic dust or crawlspace humidity may enter through openings in return ducts. Depending on the home's pressure conditions, these leaks can also contribute to interactions between the HVAC system and fuel-burning appliances.
Duct sealing can improve comfort when leakage is an important cause of uneven temperatures. However, sealing does not correct every airflow problem. A crushed flexible duct or incorrectly sized branch may continue restricting airflow even after its connections are airtight. A complete repair therefore considers both leakage and the condition of the duct system.
What Causes Air Ducts to Develop Leaks?
Air ducts develop leaks when joints separate or the air-carrying material becomes damaged. Poor installation and deteriorating sealing materials are common causes. Physical movement around ducts can also create openings, particularly where flexible branches connect to rigid fittings.
Loose Connections and Poor Installation
Duct systems contain multiple connections where straight sections meet elbows or branch fittings. These joints require mechanical attachment and suitable air sealing. When a joint is poorly secured, movement or vibration may cause it to separate over time.
A narrow gap can remain hidden beneath insulation, making it difficult to identify from the room below. The duct may continue delivering some air while allowing a portion to escape through the connection. Restoring the joint's mechanical strength is necessary before applying sealant.
Deteriorating Sealing Materials
Older duct systems sometimes contain cloth-backed tape that was used to cover joints. This material can lose adhesion with exposure to temperature changes and normal aging. Once the tape peels away, air can pass through the opening beneath it.
Approved HVAC foil tapes and mastic products are more appropriate for long-term sealing. However, they still require suitable surfaces and correct application. Applying a new product over loose dust or unstable old adhesive may result in another failure.
Damaged Flexible Ducts
Flexible ductwork can tear or pull away from its connection when it is improperly supported. The inner liner carries conditioned air, while surrounding insulation and an outer jacket provide thermal protection. A torn outer jacket does not always mean the inner liner is leaking.
If the inner liner has separated from a collar, air can escape even when the exterior covering appears intact. The connection needs to be mechanically restored and sealed according to the duct manufacturer's instructions. Severe liner damage may require replacement instead of taping.
Gaps Around Register Boots
Register boots connect ducts to supply and return openings in ceilings, floors, and walls. Gaps may exist where the metal boot meets surrounding drywall or flooring. These openings can allow air to move into concealed cavities instead of following the intended path.
The grille may look properly installed while the connection behind it remains unsealed. Inspecting the accessible perimeter of the boot can reveal a repair opportunity. The appropriate seal should close unintended openings without restricting the register itself.
How Can You Tell if Your Air Ducts Need Sealing?
Leaking ducts may contribute to weak airflow or uneven room temperatures. However, these symptoms can also result from dirty filters, closed dampers, or equipment problems. The strongest evidence of a leak is an actual opening or air movement through a damaged connection.
Common warning signs include:
- Conditioned air can be felt escaping from an exposed supply duct seam.
- A metal duct joint has visible gaps or peeling sealing tape.
- A flexible duct has pulled away from its collar.
- Rooms receive noticeably different amounts of heated or cooled air.
- Unusual dust appears near damaged return-side connections.
- Whistling develops near an accessible joint during blower operation.
- A register boot is separated from the surrounding wall or ceiling.
- Duct insulation has been disturbed, exposing damaged connections.
- Heating or cooling bills increase without an obvious change in use.
- Airflow changes after maintenance or renovation work near ductwork.
A single uncomfortable room does not prove that a duct is leaking. Comparing several rooms can help identify whether the problem affects one branch or the entire system. If visible damage cannot be found, professional leakage testing may be useful before extensive sealing work is recommended.
What Materials Should You Use to Seal Air Ducts?
Duct sealing materials must be compatible with the air distribution system and capable of remaining attached during normal heating and cooling operation. HVAC mastic and approved metal-backed foil tape are commonly used for this purpose. Mechanical fasteners are also necessary when duct sections are loose or disconnected.
| Material | Main Purpose | Typical Application |
|---|---|---|
| HVAC-rated mastic | Seals suitable seams and gaps | Rigid metal joints and approved duct surfaces |
| UL 181-rated foil tape | Provides an airtight seal on compatible surfaces | Prepared duct joints and connections |
| Reinforcing mesh | Supports sealant across wider gaps | Where required by the mastic manufacturer |
| Sheet metal fasteners | Mechanically secure rigid fittings | Metal duct connections |
| Approved clamps or draw bands | Secure flexible inner liners | Flexible duct collars |
| Duct insulation | Reduces heat transfer | Ducts in unconditioned spaces |
| Compatible vapor-barrier tape | Protects insulation from moisture entry | Exterior insulation seams |
Mastic is often useful for irregular seams because it can cover small gaps across joints and fittings. Approved foil tape may be convenient for certain straight, clean surfaces. Neither material is intended to hold a completely disconnected duct together without appropriate mechanical support.
Ordinary gray cloth-backed duct tape is not recommended for permanent duct sealing. Despite its name, it can fail under HVAC operating conditions. Products should be selected according to their intended applications rather than simply because they are labeled as strong adhesive tape.
How to Seal Air Ducts Step by Step?
A basic duct sealing project involves locating accessible leaks, restoring loose connections, and applying suitable sealing products. This approach is appropriate for sound air distribution ducts that can be reached safely. Large holes or severely damaged sections may require repair or replacement before sealing can begin.
Step 1. Turn Off the HVAC System
Switch off the heating or cooling system and wait until the blower stops. This prevents normal airflow from disturbing sealing materials while you work. It also allows closer inspection of accessible joints without air moving through the openings.
Make sure the work area is safe before beginning. Unfinished attics may contain exposed ceiling drywall that cannot support a person's weight. Avoid entering areas with unsafe temperatures, standing water, or unfamiliar older insulation.
Step 2. Locate Accessible Air Leaks
Inspect visible connections in an unfinished basement, utility room, or other safely accessible area. Look for gaps or deteriorating sealant around metal joints. Pay particular attention to branch fittings and connections near supply or return plenums.
For a preliminary supply-side check, the blower may be operated while you feel for escaping air near a suspected accessible seam. Do not place hands near moving machinery or electrical equipment. Switch the system off again before performing any repair.
Step 3. Check the Condition of the Connection
Determine whether the problem involves a small gap or a mechanically loose fitting. A secure metal joint may only require sealing, while a separated branch needs reconnection first. Look for extensive corrosion or physical damage that could prevent a durable repair.
If a flexible duct has pulled away from its fitting, the inner liner must be correctly reattached. Simply wrapping the outer jacket with tape does not restore the air-carrying connection. The manufacturer's fastening instructions should be followed.
Step 4. Clean and Prepare the Surface
Remove loose dust from the accessible exterior joint using a suitable dry cleaning method. Loose, deteriorating sealing tape may also need removal. The surface should meet the selected product's preparation requirements before mastic or foil tape is applied.
Do not scrape aggressively at corroded metal or remove protective coatings unnecessarily. A repair product cannot reliably bond to severely weakened duct material. Damaged sections should be corrected before sealing.
Step 5. Secure Loose Duct Sections
Reconnect any loose fittings using mechanical fasteners or clamps appropriate for the duct material. Rigid metal joints may require different attachment methods from flexible duct collars. The connection should remain stable without being supported only by adhesive materials.
Check that the duct's weight is adequately supported. A branch that pulls against its collar can separate again even after sealant has been applied. Correcting the support problem helps prevent repeated leakage.
Step 6. Apply HVAC Mastic or Approved Foil Tape
Apply the sealing material across the seam according to its manufacturer's instructions. Mastic should cover the opening and extend onto suitable sound material on both sides of the joint. Wider gaps may require reinforcement or a structural repair before sealing.
If compatible foil tape is used, press it firmly onto the prepared surface so its edges remain attached. Avoid wrinkles that could leave small openings. Do not cover adjustable dampers or mechanical components that need to remain accessible.
Step 7. Seal Register Boot Connections
Remove an accessible grille when it can be detached safely and inspect the connection between the duct boot and surrounding material. Small perimeter gaps may allow conditioned air to escape into concealed cavities. Seal suitable openings using materials compatible with the boot and building surface.
The repair should leave the register passage completely open. Do not place sealing materials across supply louvers or return openings. Restore the grille to its original position once the seal is ready.
Step 8. Restore Damaged Duct Insulation
After the air leaks are sealed, examine insulation around the repaired sections. Ducts in unconditioned spaces generally need suitable insulation to reduce heat transfer. ENERGY STAR recommends R-6 or higher for many such applications, although local codes may require more.
If insulation has been removed for access, restore it without compressing the material excessively. Its exterior vapor-retarding covering should remain continuous. Wet insulation should not be wrapped again without correcting the moisture source.
Step 9. Allow the Sealing Material to Cure
Different mastic products have different drying and curing requirements. Follow the product instructions before restarting the HVAC equipment. Applying airflow pressure before a seal is ready may interfere with the repair.
Inspect the joints for visible gaps or loose edges after curing. The connections should remain mechanically sound. A properly sealed joint should not rely on the dried mastic to support a detached duct.
Step 10. Restore Operation and Check Airflow
Return the HVAC system to its normal operating setting and check whether the repaired connections remain stable. Compare airflow at affected registers with the condition observed before sealing. A previously noticeable supply leak should no longer release air through the repaired opening.
A household check cannot measure total duct leakage accurately. Professional testing may be appropriate when several repairs were made or significant comfort problems remain. The objective is both airtightness and proper airflow through the system.
How Do You Seal Different Types of Air Ducts?
The sealing method depends on the material and construction of the duct. Rigid metal sections usually have seams that can be accessed and sealed directly. Flexible ducts have layered components that must be repaired in the correct order.
Sealing Sheet Metal Ducts
Sound sheet metal ducts can often be sealed at joints with mastic or approved foil tape. Larger gaps or holes may need a mechanically secured metal patch. The surface should be dry and stable before sealing materials are applied.
Metal ducts affected by severe corrosion may require replacement. Covering crumbling steel with several layers of sealant does not restore structural strength. The damaged metal must be repaired before the section can remain reliably airtight.
Sealing Flexible Duct Connections
Flexible duct connections require the inner liner to be secured to a compatible collar. Approved clamps or draw bands are commonly used for mechanical attachment, followed by the specified air-sealing method. The insulation and outer protective jacket are then restored.
A torn outer covering does not automatically indicate an air leak. The inner liner should be evaluated separately. Severely torn or crushed flexible ducts often require replacement rather than improvised patching.
Sealing Return Air Ducts
Return-side leaks can draw air from unintended spaces into the HVAC system. These leaks may be less noticeable than supply leaks because air moves inward through the damaged opening. Inspect accessible return joints and filter cabinet connections for visible gaps.
Return sealing can affect pressure relationships within a building. In homes with gas or oil-burning appliances, a qualified contractor should consider combustion venting when significant duct changes are made. Proper sealing should improve the return path without restricting the air the equipment needs.
What Is the Difference Between Duct Sealing and Duct Insulation?
Duct sealing prevents air from moving through unintended openings, while duct insulation limits unwanted heat transfer through duct walls. Both can improve system performance, but they address different problems. A well-insulated duct can still leak, and an airtight duct can lose heat when its insulation is inadequate.
| Feature | Duct Sealing | Duct Insulation |
|---|---|---|
| Main purpose | Prevent air leakage | Reduce heat gain and loss |
| Common materials | HVAC mastic and approved foil tape | Fiberglass wrap or insulated duct products |
| Typical problem | Gap at a connection | Exposed or poorly insulated surface |
| Effect on condensation | May reduce unwanted humid air movement | Helps limit cold surface exposure |
| Repairs disconnected sections | Requires mechanical reconnection first | No |
| Replaces airflow balancing | No | No |
Sealing should generally be completed before insulation is restored over an affected connection. Otherwise, the insulation may hide a continuing air leak. Both improvements should preserve the duct's intended airflow capacity.
How Much Does Air Duct Sealing Cost in 2026?
Professional air duct sealing commonly costs $500 to $4,000 in the United States in 2026, with an average around $2,250 in published national estimates. The price depends on the size of the duct system, accessibility and the method used. A limited repair at one exposed joint can cost much less than a complete sealing project.
| Project Scope | Approximate 2026 U.S. Cost |
|---|---|
| Minor accessible leak repair | $150 to $500 |
| Partial duct sealing | $300 to $1,500 |
| Whole-house duct sealing | $500 to $4,000 |
| Professional leakage testing | $150 to $450 |
| Extensive repair or duct replacement | Requires a damage-specific estimate |
These estimates describe different project scopes and should not automatically be added together. A whole-house quote may already include testing or repairs to accessible joints. The proposal should specify whether hidden leaks and damaged duct sections are included.
Aerosol-based sealing is another method used for suitable smaller leaks in concealed ducts. It does not reconnect detached branches or restore collapsed material. Contractors should explain whether the method is appropriate for the existing system and how the completed work will be verified.
What Mistakes Should You Avoid When Sealing Air Ducts?
Improper sealing can leave air leaks unresolved or create new restrictions. The most common mistake is applying tape over a mechanically loose connection. The fitting may separate again because adhesive materials are not a replacement for structural attachment.
Avoid these mistakes:
- Using ordinary cloth-backed duct tape for permanent sealing.
- Applying mastic over dirty or deteriorating surfaces.
- Covering disconnected fittings without securing them.
- Sealing over extensive rust or structurally damaged material.
- Blocking register openings or adjustable dampers.
- Repairing only the outer jacket of a torn flexible duct.
- Covering wet insulation without correcting the moisture source.
- Attempting repairs in unsafe attic or crawlspace conditions.
- Applying ordinary duct sealant to combustion exhaust components.
- Making extensive airflow changes without checking system performance.
Furnace flues and combustion vent connectors are not ordinary supply or return ducts. They carry combustion exhaust and have separate material requirements. Suspected damage to those components requires qualified attention because improper repairs can create a carbon monoxide hazard.
When Should You Call an HVAC Professional?
Professional duct sealing is appropriate when leaks are concealed or substantial duct damage is present. A qualified technician can inspect supply and return connections and determine whether testing is necessary. Large projects should address disconnected ducts before any specialized sealing method is used.
Professional leakage testing provides more reliable information than feeling for drafts around exposed seams. It can establish a baseline and measure changes after sealing. The technician should also evaluate airflow because closing leaks does not necessarily correct restrictions or improper duct sizing.
ENERGY STAR recommends combustion safety testing after duct improvements in homes with gas or oil-burning appliances. This helps identify pressure conditions that could interfere with safe venting. The work should improve airtightness without creating a separate safety concern.
How Can You Keep Air Ducts Sealed for Longer?
Long-lasting duct sealing depends on stable connections and compatible materials. Even a well-sealed joint can fail when a flexible branch is pulled or a metal fitting becomes loose. Protecting exposed ductwork reduces the chance of new openings developing.
Inspect safely accessible joints during seasonal HVAC maintenance for peeling sealant or visible separation. Keep heavy stored objects off flexible ducts and maintain suitable support spacing. Check disturbed connections after attic or basement renovation work because physical contact can damage otherwise sound seals.
Moisture control is also important. Persistent condensation can damage surrounding insulation and contribute to corrosion on susceptible metal surfaces. Keeping ductwork dry helps preserve both the sealing materials and the underlying connection.
Conclusion
Sealing air ducts involves locating leaks and restoring loose connections before applying approved HVAC sealing materials. Mastic and metal-backed foil tape are suitable for many accessible joints, but they cannot repair every type of damage. Duct insulation and airflow should also be checked after sealing. Larger or concealed projects may require professional testing. Start by inspecting the most accessible duct connections for visible gaps and deteriorating seals.